Tag Archives: Tutorial

Thrifty Living: How To Make A Terrarium Ornament

30 Jan

As you may remember, some friends and I decided to make this year a Handmade Christmas. What gifts I gave were either thrifted or handmade.  While browsing my local craft store for Halloween decorations in September I found a bin filled with these empty plastic ornaments and immediately I knew I’d be turning them into terrariums come December.

If you’ve never made a terrarium before I have a beginner’s tutorial as well as an assortment of terrarium inspiration and information. Terrarium ornaments are simple to make and it was fun to give my friends the gift of something green and growing during the cold winter months. The medium-sized ornaments were a $1.50 at my local craft store, which meant that even I could afford a bunch to give as presents.

Materials:

  • garden soil, preferably damp, hold the gravel
  • plastic ornaments from a craft store, medium-sized
  • paint brush or chopstick
  • tweezers
  • weeds, moss, or other small plants
  • a funnel (or a piece of paper cut to size and rolled to make a funnel)
  • a small shovel

If making tags like mine you’ll also need:

  • decorative paper
  • glue or rubber cement
  • scissors
  • pencil

Instructions:

1. Take your soil and mix in drops of water (or use a spray bottle) until you have damp–but not soggy–soil.  Soil with good drainage works well, so look for the kind that has bits of Styrofoam mixed in or that is specially made for succulents and cactus. Valley soil is perfect because it’s so sandy, but you probably don’t live near me, so look into your local soil first to see if you can use it straight from the ground like I did.

2. Remove the wire topping of your ornament and fill the it a third of the way full of soil using your trowel and funnel. Make sure any rocks or gravel pieces aren’t going in. While they are useful for drainage they also add weight, which we don’t want.

3. Gently pluck some weeds from the ground (or from the fancy container you purchased your plants in) leaving the roots intact. Gently use your tweezers and the stick end of your paintbrush or chopstick to poke your plant through the hole and arrange so the root side is in the dirt. This is the trickiest part, but also why weeds are a good choice: they are used to growing in challenging circumstances and bouncing back even after they’ve been shoved in a jar.

4. Add a few (very few) more drops of water, replace the top, and there you have it–and awesome handmade terrarium ornament that took you all of fifteen minutes to make.

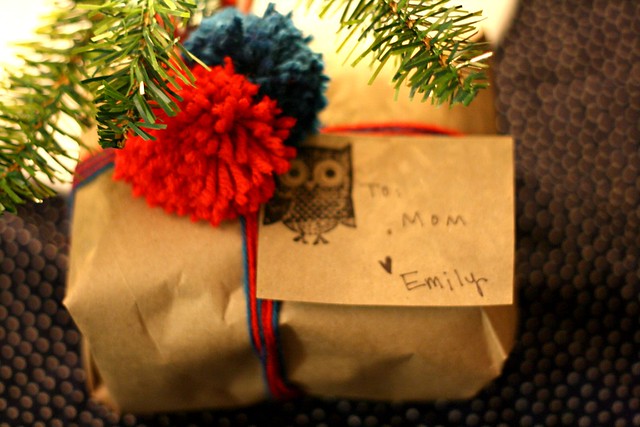
Let’s say you are giving these as a present and want to make a gift tag like I did. No problem, it’s easy! I used the tags that were already attached to the ornaments because they were simple and sturdy.

1. Leaving the tag on the ornament, trace its shape onto a decorative piece of paper using a very sharp pencil. Include a mark for the center hole.

2. Cut out and use that tracing to make two tags for each ornament you are making.  Cut them out.

3. In each tag, cut a slit and a hole for the plastic ring to go through. This is difficult for me to explain, so if you need a visual, click here.

4. Glue the decorative paper to each side of the tag. I used rubber cement and then set a book on top of each tag to prevent warping.

5. Finally, add the person’s name or a holiday message with a pen. A really good idea would be to include simple care instructions on one side of the tag as terrarium maintenance isn’t exactly a common skill. I did not do this because I only just thought of it, but I wish I would have.

I tried making these with both the larger ornaments and the medium-sized ones and it turns out that the medium-sized ones are far better. I wanted the large ones to work because they could hold more plants and maybe even some plastic toys, but the thin wire ornament tops wouldn’t support all that weight and the whole thing kept falling apart. Not a good sign. The medium size worked perfectly.

You can decorate these with plastic toys as long as they are small, lightweight, and will fit through the opening. You can adjust them with your tweezers and paintbrush once they are in. Ribbon would be a lovely way to accentuate and hang these ornaments, too, if you don’t like the look of the plastic ring or the tag. The fact that these ornaments are so simple is what lends them great potential and versatility.

This project was extra thrifty since I had all the materials on hand except the ornaments. If you try this, please let me know! I’d love to hear how it worked for you.

Guest Post: Pom Pom Tutorial by Emily Bilbery

13 Dec

I am excited to present to you a guest post from the lovely and talented Emily Bilbery of Uffda Designs. Emily is a WAHM who sells her crafts on Etsy while watching and playing with her smooshy-cute daughter Poppy. She’s creative and knows how to have a thrifty good time and today she’s going to show us how to make pom poms. Bonus thrifty tip: lots of times you can find donated yarn at thrift stores when people decide it’s time for a de-stash, so keep your eyes open for thrifty deals.

Take it away, gorgeous!

************************

season’s greetings, darlings! i’m completely honored to be guest-posting here today. little big is one of my all-time favorite blogs, and i’m so very excited to share a bit of crafty goodness with you all. i share carrie anne’s love of all things frugal and i also wanted my craft tutorial to be something that people on any budget and holding any skill level could make. so today i’m going to show you how to make yarn poms, a yarn pom garland and pom-embellished gift wrapping, without any sewing required! you’ll simply need:

* yarn (can be found at dollar stores and thrift shops, as well as craft stores.)

* sharp scissors

* wrapping paper of your choice, if you plan on using your poms to adorn gifts (rolls of plain brown, recycled paper can be found at dollar stores, target & hardware stores. another great option is hemming blocks thrifted/vintage fabric in various sizes to re-use in many years to come! gifts look so lovely wrapped in pretty fabric and tied with ribbon, string or yarn.)

now it’s time to make some poms!

POM POM TUTORIAL

1) first, begin loosely wrapping your yarn around your index and middle fingers, leaving a small gap between…

2) wrap,  wrap, and wrap some more until you have a large bundle of yarn accumulated! use a little more than you think you’ll need, to create nice fluffy poms.

3) next, cut a small length of yarn (around 6 inches) and wrap it under/around the center of your bundle of wrapped yarn, between your fingers.

4) tie in a basic knot.

5) then slip your fingers out, tighten your strings in the center, and double-knot tightly to secure.

6) then, use your scissors to snip through the loops of yarn. work your way around the little donut…

7) and watch it magically transform into a fluffy yarn pom! trim around your pom with scissors until you have a nice uniform puff.

easy-peasy, right?!

if you’d like to make a garland with your poms, here’s a really easy, no-sew method:

POM POM GARLAND TUTORIAL

1) cut a length of yarn that will reach across the area you want to hang it.

2) create poms in your desired colors & quantity to adorn the garland.

3) cut small lengths of yarn (around 6 inches) to match the number of poms you’re using.

4) tie the small length of yarn onto the large one with a basic knot.

5) then tie your yarn pom on through the center, and double-knot tightly to secure.

6) trim off the excess pieces of yarn, and repeat with your remaining poms to create your garland!

7) (optional) if you’re sewing-savvy, you can just grab an embroidery needle, thread it with yarn, and sew right through the centers of your poms to create a garland in no time!

these garlands are so cheerful and can be created to match any decor – try them for various holidays, or to match a child’s room. you could also make a long bunting to adorn a christmas tree! so very festive!

another great way to feature poms is to decorate gifts with them. this year i’m wrapping all of my christmas gifts with plain brown paper, yarn, and yarn poms. there is no limit to the color combinations you could use, or to the number of poms for each gift! they look equally cute with one pom or many. simply wrap your desired amount of yarn around your package, tie into a knot, and use a small length of yarn to double-knot your poms on (just like in the garland instructions above.)

here’s a few additional pom ideas, just for fun:

POM POM IDEAS AND INSPIRATION

* pom-embellished wreath! james at bleubird made the cutest one i’ve ever seen. plain wreaths can be found at dollar stores & craft stores.

* add poms to mittens, slippers or hats! simply thread some yarn onto an embroidery needle, push a generous stitch through the area you want the pom to lie, tightly double-knot the pom into place, and trim off the excess yarn.

* snag an ornament hook onto individual poms to create instant baubles for your christmas tree.

* pom book mark – cut a small rectangle of cardstock, punch a hole in the top, and tie on a pom!

* pom hair pretty – tie a yarn pom onto a hair elastic, or use hot glue to attach one (or more!) to a hair clip or headband.

happy crafting, and happy holidays! thank you so much again to carrie anne for inviting me to guest post. i hope you guys enjoyed this little tutorial!

cheers!

emily

Thrifty Living: Drying & Saving Herbs

22 Nov

Today I’m going to show you the best way for storing cut herbs. No, I’m not talking about one of those herb saver dealies, but you can certainly go out and spend 15-20 bucks on that if it makes you feel better. That might be worth it to you, but besides the fact that it costs money it’s just another thing that serves a single purpose that you’ll inevitably have to clean and store and care for for the rest of your life, or until you chuck it in the garbage. Wow, I really sound like a grump about those things. I’m not, really.  If the situation presented itself I’d love to try it. I do love me a kitchen gadget after all, but the fact is I don’t have the budget to go bandying about on something that can just as easily be remedied by some scissors, a tall glass, and some water. So, here’s the thrifty way to preserve your freshly cut herbs:

1. First, take your bunch of herbs (here we have Thai basil from the Farmer’s Market), and snip off the ends. Just like with cut flowers, snipping the ends every few days helps ensure a crisp, clean stem to help circulate the water better.

2. Fill a glass part way up with water and plunk the herbs in. It will smell really, really lovely, as that is the nature of herbs, but press on anyway. Make sure the stems are well submerged in the water, or else the top of your herbs will dry out and get crispy. (If some do get crispy, don’t panic: just avoid them in favor for leaves that still have life in them.)

3. Place in the refrigerator. Ta-da! They will keep well for several days, and up to a week or more depending on the freshness of the herbs and the type of herb you are saving. You may need to add water or change it out  if it becomes cloudy or murky, but other than that you are good to go.

I buy some sort of herbs every week at the grocery store or farmer’s market. My herb garden isn’t large enough to supply every herb I need, but inevitably when I buy herbs this way I always have a ton left over. In an effort to cut waste and boost nutrition I’ve been adding the leftover chopped herbs to my food on a daily basis. Almost everything you eat can benefit from some chopped Italian parsley (which is usually what I have leftover), so I’ve been adding it to eggs, sandwiches, salads,  over chicken, in soups, whatever. At the end of the week, I’m usually left with a bunch of slimy stems that can be tossed straight in the compost bin.

Last week I harvested some fresh herbs from my garden and dried them in the oven. I got a lot of requests for tutorials on twitter, and you are going to be surprised at how easy it is:

1. Preheat oven to 180 degrees F.

2. Line a baking tray with parchment.

3. Place clean, dry herbs on try.

4. Dry for 2-4 hours.

You’ll know your herbs are done when they crackle and flake into bits when crumbled. Delicate leaves will take closer to two hours while stems and heartier plants will take nearer to four. The thing you’ll notice is that they are still very freshly green when dried this way as opposed to dried herbs you’ll by from the store.

Featured On: Make And Takes! Children’s Terrarium Tutorial

23 Aug

I am so excited today I an hardly stand it: today I am a guest poster for Make and Takes Summer Camp series! I have been avidly reading and voraciously bookmarking Make and Takes for over a year, so imagine my excitement when I found out I could create a children’s terrarium tutorial as a guest poster.

Check out the post here.

I have loved this blog even before I had Isobel. Though a large part of the site is geared for or with children, you don’t have to be a parent to find inspiration and wonderful ideas there. Craft ideas, inspiration, and food–I’ve pinned the hell out of that website on Pinterest and saved hundreds of bookmarks and now I hope someone will take inspiration from my post.

Head on over to read my Children’s Terrarium Tutorial. And give me a high-five while you’re at it.

Little Big Links: Party

9 Apr

Custom Thank You Notes: The featured idea is for baby shower items, but it works with any party. I’m sending out standard thank yous, but including a picture of Isobel and a picture of themselves or their kid, too.

Mini Fondue Kit: This favor idea is for adults only.

Collage Favor Kits: Although meant for children, I’d be stoked to get one of these.

Fabric Party Streamers Tutorial: Make them once, use them for years to come.

Make Fringy Streamers: So simple I could have done this for Isobel’s party.

LPC Party Planning Spreadsheet: the party organization chart of my dreams.

DIY Hello Kitty paper lantern tutorial: Anybody out there love Hello Kitty?

Spray Paint Thrifted Glassware: this looks so lovely. Perfect for a baby or bridal shower.

See also Little Big Links: Cake.

Terrarium Inspiration

4 Nov

Yesterday I posted a tutorial on how to create terrariums, but something weird happened and it posted in the past. By the time I noticed and fixed the back-dating issue it was nearly today. I know that sentence barely makes any sense, but that’s what I get for fucking with the space-time continuum. If you haven’t read the tutorial, it’s very very easy. If you have read it and can’t wait to get started, here’s some container, plant, and figurine inspiration. If you found my blog by searching for “how to build wet terrariums”, seek help immediately. Possibly in the form of a dictionary.

If you’re lucky enough to find a vintage terrarium container while thrifting, scoop it up and never look back. They aren’t that easy to find. I’ve been lucky enough to find three: an acrylic egg-shaped one, a glass mushroom, and a glass apple. I’m keeping my eye out for more and you can bet that if I find one it’s going up immediately in my store.

Before I ever found those, however, I made countless terrariums out of inexpensive thrifted glass containers. That’s the beauty of terrariums—they are adaptable and can be made from all sorts of things.

My first terrariums were created in thrifted fish bowls and storage jars from Ikea. The more I kept my eye out for interesting jars and things while thrifting the more I became inspired. I found all sorts of lovely glass bowls. I especially loved making them in tiny containers. Especially if they said something weird like, “Bishop’s Awards Dinner.”

I once bought a glass jar from either Crate and Barrel or CB2. I may have registered for it, actually. I don’t remember but I’ve had it for awhile. It was just sitting somewhere taking up space when I thought I know! I’ll make it into a terrarium! I get the most compliments from this terrarium.

One of my favorite terrarium bowls was a vintage thrifted find that was hand-blown with little bubbles embedded in the glass. Gorgeous.

I like to liven up the simpler terrariums by adding extras: toys. Historically some terrariums featured little figurines, especially mushrooms, as a decorative touch. The egg terrarium I bought came with a vintage mushroom and swan. I’ve seen some terrariums add dinosaurs for a whimsical prehistoric touch and it made me want to add more toys to mine.

Anthony and I collected the totally strange and inexplicably rave-themed Buddha Buddies from a vending machine in an old grocery store. Why they were ever created is a mystery but I love adding them to my terrariums. I purchased plastic sea creatures from the craft store and made one that resembled octopus in a bed of kelp. The terrarium I keep at work has a roaring hippo.

My sister bought me this good-luck cat and it was very happy in the terrarium I kept by the sink.

I used to keep all my terrariums on the counter near the fruits and vegetables. They looked really lovely and unfortunately I never took any pictures of them, so enjoy my cat amongst produce and a dismembered pomegranate along with your terrariums.

When I want to create a new terrarium I troll the Terrarium group that I moderate on Flickr for inspiration and it never lets me down. Really, any glass container has terrarium potential.

How to Create a Terrarium

3 Nov

Creating a terrarium is incredibly easy.  If you’ve wanted to make one but have been too nervous to get started, I hope that by the end of  this post you are going to wonder what all the fuss was about. Anyone can make one, and this is the perfect activity to do with school-aged children—it’d start some neat conversations about biospheres and the processes of life.

First thing to note is that I am calling all of these creations “terrariums” even though in the strict sense of the word they are not: most of mine are uncovered environments, meaning they don’t develop their own little enclosed ecosystem. I call them terrariums to convey the sense that they are contained within glass. Enclosed terrariums are a lot trickier to establish than open ones but are still simple to put together.

Along with terrariums you may have also heard of vivariums. They are terrariums that function as a living environment for captive insects, reptiles, or amphibians. You have the challenge of creating an ecosystem not just for the plants involved but also for other creatures. Those are much more complicated and time consuming. For now, let’s just stick with plants, shall we?

Choose Your Container

The kind of terrarium you create will depend on the type of container you have on hand and the type of plants you are going to use. You’re going to want to match the plant to the container, or vice versa.

STEP 1: Choose a glass or clear plastic container. Either wipe out the inside with a rag or swish some water around in it if it’s used.

Pick Your Plants

My favorite type of plant is the succulent, but you absolutely don’t want a humid, enclosed terrarium for them. They like dry conditions and well-drained soil or else they rot. If you have your heart set on an enclosed terrarium, use moss, ferns, or my favorite, spider plants. Spider plants are always having little spider plant babies and in my experience aren’t deterred by an enclosed terrarium. Moss and ferns love a humid environment. I’ve never grown moss (it’s not wet enough around here to occur naturally) but I’ve had no trouble establishing ferns in enclosed terrariums.

STEP 2: Have your plant ready. Choose one that’s on the small side.

Lay The Foundation

Terrariums need some sort of rocky base for the excess water to drain into. Horticultural charcoal is really nice if you have it. It helps absorb excess moisture that could lead to fungus growth and rot. I’ve used it with good results, but then I ran out and just proceeded on with rocks and soil and it turned out fine. I’ve used decorative gravel from a big box craft store, treated aquarium gravel from the pet store, and actual gravel we just happened to have in the backyard. At first I was a little worried that the treated gravel would have wacky, unintended results in my terrariums, but I haven’t noticed anything strange because of it. The gravel from my yard worked just as well as the gravel from the craft store, but it wasn’t as good-looking, to be honest.

STEP 3: Fill your empty container with about an inch or so of pebbles. This depends on the size of your container, but an inch or two should be fine. If you are using horticultural charcoal, add it in a thin layer on top of the pebbles.

Add Your Soil

I usually use a sterile potting mix. If you get peat or some perlite mixed in that can help with drainage. I’ve also added in soil from my backyard, too when I was running low on potting mix. One time I created an enclosed terrarium but did not use sterile potting mix. A gnat of some sort laid eggs in the soil and within two days my lovely enclosed terrarium was swarming with tiny flies. It was nauseating.

STEP 4: Add your soil. Make sure it is very moist. It shouldn’t be dripping, soggy-wet, but it should be moist. I like to add about two or three times as much soil as pebbles, but this depends on your container. How much soil you need depends on the plants you choose and how deep their root systems go. Three or four inches of soil, or even more, has worked for me.

Add Your Plants

Moisten the soil and add your plants. The trick is to add very small plants. You don’t want to add a plant that looks like it would fit—you want to go much smaller. If you add a plant that fills out the terrarium already you are going to have to repot the sucker immediately or it will outgrow your container. Start with miniature-sized versions and expect them to grow.

STEP 5: Transfer your plants like you normally would when repotting. Gently pull it out of the pot, loosen the root ball, and set it in a hole you dug inside the terrarium. Cover gently with soil.

Add Aesthetic Touches

It’s traditional to add a little figure or statue to your terrarium. It’s definitely not necessary and I don’t always add them, but small toys can be an extra fun step in creating terrariums. When I bought my egg-shaped terrarium it came with two vintage, hand-painted figures: one a tiny mushroom and the other a miniature swan. Personally I like to add toys to the mix: a dinosaur, or a gnome, or tiny plastic ninja. It’s fun and cute but certainly not necessary nor needed.

Some people get very creative with their terrariums and they landscape the soil as they put it down to give their terrariums hills and valleys. Or they sprinkle the surface of the soil with gravel or sphagnum moss. Terrariums look lovely on their own but think of it as gilding the lily.

STEP 6: Add gravel, rocks, figures, or other decorative touches. Completely optional.

Growing Tips

The frequency and amount of water will very per plant and container. If the terrarium is enclosed and the soil is moist enough, you won’t need to do more than an infrequent misting with a spray bottle. Sometimes a trickle of water from the watering can once a week is all that’s needed. Succulents like their roots to dry out in between watering but ferns like to stay moist. If you can get a good condensation going on the glass of your enclosed terrarium, then you needn’t interfere.

Terrariums do best in indirect sunlight. Never place them in direct sunlight because the temperature inside will rise and kill your plants. Too little water is better than too much water. Overwatering promotes the growth of bacteria and fungus.

Repotting

Reassure yourself with the knowledge that some terrariums are not going to last forever. Sure, there’s the trial and error of establishing a plant, but even when things go well your terrarium might only last a season. Some plants do so well in terrariums I’ve had to repot them after a few months because they’ve outgrown their container. Some plants I’ve been able to keep going for six months to a year before they ran out of space, but some plants more and some plants less. This isn’t a failure—it’s a success.

External Links

My awesome friend Kate (whose home is so gorgeous her kitchen was featured in Better Homes and Garden) started this terrarium group on flickr. It is by far the coolest group and has tons of amazing terrariums for inspiration. Kate made me a moderator of the group and I invite people to participate whenever I can. If you create a terrarium please add it to the group! We’d love to have you.

I am not an expert on terrariums. I’m just someone who loves them and who has made a few and wanted to share what works for me. You can find more information about terrariums here:

Here’s a teaching activity about creating an environment in a soda bottle.

This guy’s all about terrariums.

I really like this site.

If you use this tutorial to create a terrarium, please share it! If you post yours on flickr please add it to the terrarium group and add a link in the comments here so we can see your work. If you have any questions let me know and I’ll answer them as best I can.

Sharing the Crafty Love

18 Aug

Before Isobel was born I indulged both my love of crafts and my love of organizing by creating closet dividers for the multitude of tiny pink garments we were receiving by the truckload. The project ended up taking up much more time and effort than I had originally planned, but I was fueled by the nesting urge and once I started there was no stopping me.

It was so much work I wanted to share the process with others who might be trying to create the same thing so that they could learn from my mistakes. You can find the tutorial here along with a handy-dandy door hanger template I made in Photoshop.

After reading the tutorial, head on over to Mommypalooza to see her back-to-school closet dividers for her two sons that share a closet. She’s used my template to create her own version and I’m happy she’s found a way to utilize the project that doesn’t involve hours and hours of cutting and laminating and cutting. Because seriously, that was a lot of work.  (That no one forced me to do.)

(Besides myself.)

(Because I was crazy.)

(And pregnant.)

(I’m not longer one of those things, by the way.)

(I’ll leave it to you to figure out which one.)

Anyway, I’ve been thinking about what do to with these when I don’t need them anymore. I put so much work into these things I can’t fathom throwing them away. I thought about selling them but let’s face it, they are used and could be sturdier. If I’m still blogging by the time I’m ready to pass these suckers down I’ll probably have a giveaway for them, so if you’ve always wanted the closet dividers without all the work, stay tuned.

The Friends of Isobel Book

1 Jun

While Isobel was still quite young we decided to create a Friends of Isobel book. Something that had photos of all of our friends so we could show her the names and faces and she could be familiar with everybody, including our good friends who live really far away. This worked out so well I immediately started work on a Family of Isobel book. That’s taking a little longer, though, because I want to be sure to involve family we rarely see who live far away. It’s been a struggle to track down all their photos but I’m almost done.

Isobel has really loved her Friends of Isobel book. From a young age she’s been absolutely fascinated by photographs and  much prefers photographs to any cartoon image. We point to the faces in the book and say their names and she watches attentively.

We used an online photo service to create this book (I think it was Shutterfly) but a lot of  companies do this so shop around. We went with softback because it was cheaper and money’s tight, but I sometimes think we should have gone with hardback because a toddler dishes out some heavy wear and tear. All of the pages are wrinkled on yesterday she even managed to rip one page out. The cover is bent and worn with love.

This kind of loving abuse would have happened to a hardcover book as well. Really the only way to have prevented it would have been the careful monitoring of her every time she was around it. That really went against the spirit of what we were trying to accomplish but I certainly understand any parent’s decision to do so. We’ve had so many wonderful moments of catching her with the book when she didn’t know we were looking, flipping through it, pointing to our friends’ faces, and talking to them. I’ve seen her sit in front of the book and say, over and over in her pitch-perfect baby voice, “Hi. Hi. Hi.”

Sometimes she just babbles softly to the pages of the book and sometimes she’ll talk to them excitedly. For us it has been worth the abuse this book has suffered to see her make her own memories with the photos of her and our friends.

The small softcover book that we purchased was about twenty bucks I think but this could easily be done for less. In fact, a book is not necessary at all. You could easily just get a small photo album and fill it with photos of people, animals, or places to familiarize your baby with. We added  a small amount of text next to each photo that includes our friend’s name and a sentence about them. This way we could read the book to her at bedtime. A photo album with pictures could work just as well as you could tell whatever stories pop into your mind. And it would be cheap enough and easy enough to change the photos around if you got bored. The possibilities are endless and really the point is to share photos of people you love with your kid in a way that entertains and educates them.

Currently this book is pretty ratty and worn-looking but it reminds me of the story of the Velveteen Rabbit: this is what one looks like when one is loved.

Closet Dividers Tutorial

30 May

I received a lot of interest in my flickr series about the closet dividers I made for my daughter’s nursery so I thought I would post a little tutorial for those of you crazy enough (or pregnant enough) to attempt it. It has been suggested that I not post a tutorial for this and that instead I create these dividers to sell on Etsy. As fun as they were they were a whole lot of work and I’d feel compelled to charge hundreds of thousands of dollars in compensation so I think we’re all better off with a tutorial.

For those of you who remember, I received more baby clothes for Isobel before she was born than my husband and I own put together. I’m talking massive amounts of ittty bitty pink onesies, dresses, overalls, footie pajamas, socks; you name it, I had four of them. Including infant bathrobes. Which, shockingly, I never used. I folded them all neatly and stacked them next to my supply of infant smoking jackets.

My trepidation grew with my belly. How on earth was I going to keep track of all these clothes? All these sizes? All these hangers? (Note to new moms: you will never have enough baby hangers. Stock up when you can.) I decided to put my nesting urge to work with my obsessive tenancy to organize and came up with the perfect solution: homemade closet dividers.

These are a lot of work, a whole lot of work, and when I first began the endeavor I didn’t realize it would be as time consuming as it was. However, if you are pregnant and in the midst of nesting like I was, you will go to ridiculous lengths to complete this project.

I’m sure there’s more than one way to do this but I’m going to post the way that I went about it. If any of you figure out an easier way to do this, please speak up in the comments. I’m sure there are crafters out there who would be eternally grateful.

MATERIALS


Paper – The most obvious thing you’ll need for this project is paper, gorgeous paper that you love, and the thicker the better. I went to the store in my town and found a notepad of large square crafting paper. It was gorgeous and I think I used all but one sheet. It was expensive, though. I’m not used to spending twenty bucks on paper. You’ll also need printer paper or some other paper to use as labels. Of course, you could also use printer-friendly labels found at an office supply store. Your choice.

Cutting tools – By this I mean scissors but I also mean any other nifty tools that would help you cut out the circles from the middle of the hangers and any other tool to fancy up the paper. I used a hole-punch designed for making rounded edges on photographs for rounding the edges on my labels. I won it as a door prize for attending a scrap booking party one time, but I’m sure you could find them at the craft store.

Adhesive – I used rubber cement for this but I’m sure Mod Podge would work if you want to decoupage them. I’m sure other sticky substances would work, too. Just remember that Elmer’s glue can make paper wrinkle. Experiment and find out what works for you.

Door Hanger Template – I made this one in Photoshop and posted it on flickr. Enjoy, and feel free to make any adjustments you see fit!

Laminator – You don’t have to laminate these, but it really helps them last. As I mentioned, you can always decoupage them. Lamination services are available at some office supply stores or at copy centers like Kinko’s.

THE PROCESS

The first thing I did was figure out my closet organization layout to determine what labels I wanted to use. If I can figure out a way to post my labels so you don’t have to go through the headache of making them, I will. Because that was a lot of work and I sort of want to be your personal label-making savior. You do need to figure out how many labels you need to figure out how many dividers you’ll make. And then you’ll need two copies of each label because the dividers are double-sided.

Print out the closet divider template on some very thick cardstock-ish paper. After it’s all printed and cut out and ready to go lay it on the wrong side of one of your fancy papers and trace with a pencil (oops, forgot to add that under materials – pencil!). I was able to fit three dividers on each piece of fancy paper.

You are going to trace the template twice for each divider so count out how many you need and double that. Trace them and cut them all out. Once that’s done, you can begin the long process of gluing the dividers wrong-side together. Let them dry for awhile. I matched the dividers up so that they had the same paper on either side but now I’m not sure why I bothered. It would be just as cute, if not cuter, to have mismatched sides. No matter, cut ‘em out, glue ‘em together, let ‘em dry.

Attach a label to each side of the divider. You can get as fancy or simple with this as you want. If I can figure out how to post the word doc labels I made I certainly will, but don’t limit yourself. If you have great penmanship you can write directly on the dividers themselves, or create your own lovely labels in Photoshop or Word. Avery makes those labels you just run right through the printer and that always works, too. Like I said I just printed mine out from word, cut them to side, and then fancied up the edges by using a photo-corner-roundening punch.

After the labels are created and glued on and all dried you can decide whether or not you want to laminate them. If you do decide to go that route, leaving an edge of lamination around the dividers is a good idea. I did not and some of them started to come apart a bit. The big pain about laminating is that after all that cutting you then have to go back and cut them all up *yet again* before they are done. Honestly, however, if you’ve gone to all the work of making these you’re probably going to want them to last, so in my opinion it’s worth it. Plus, if you’re reading this there’s a good chance you’re a crazy pregnant lady hell-bent on nesting and nothing will prevent you from completing this task. That’s how it was for me.

TA-DA!

If you’ve followed these steps you now have your own gorgeous closet dividers perfect for you organizing the tons of baby clothes you’re obsessively organizing and then re-organizing at three in the morning. I’d love to hear from anyone out that who had the stamina to try this.

SO, TO SUM UP:

  1. Figure out what sections you want in your closet
  2. Print out the labels on printer paper, nice paper, or on self-adhesive, printer-friendly labels.
  3. Print out the door hanger template on thick paper and cut out.
  4. Trace template on wrong side of fancy paper
  5. Glue two fancy papers wrong-side together for each divider.
  6. Stick or glue label on each side of divider.
  7. Laminate divider
  8. Cut out divider

Questions? Experiences? I’d love to hear all about it in the comments.